
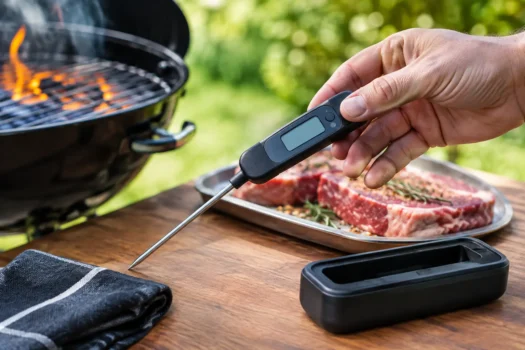
A brisket can look perfect, a chicken can have crisp skin, and your grill can hold steady heat – yet a thermometer that reads 8 degrees low can still leave you serving undercooked food. That is why a thermometer calibration guide belongs in every serious backyard cook’s routine. You do not need lab equipment. You do need a few minutes, clean water, and the discipline to check the tool you trust most.
For grilling, thermometer accuracy is not a minor detail. It affects food safety, doneness, timing, and the repeatability of every cook. A probe thermometer that is off by a few degrees may not matter much when checking a steak at 135°F. It matters far more when verifying chicken near 165°F or cooking pork shoulder until its collagen has properly broken down.
Why thermometer calibration matters on the grill
Most decent digital instant-read thermometers arrive reasonably accurate. The problem is that accuracy does not stay guaranteed forever. A probe can drift after drops, moisture intrusion, heavy use, dead-battery episodes, or exposure to temperatures beyond its rating. Dial thermometers can shift after one hard knock against the grill cart.
Grill conditions make small errors harder to spot. Wind, cold weather, flare-ups, and uneven heat already create variables. If your thermometer is also wrong, you may chase a problem that is not actually in the grill. You keep adjusting vents, burners, or pellet settings when the real issue is the number in your hand.
Calibration does not necessarily mean making an adjustment. First, it means checking accuracy against a known temperature. If the thermometer has a calibration function, you can correct it. If it does not, you can still record the error and account for it while cooking. If the error is large or inconsistent, replacement is usually the sensible move.
The two checks every thermometer should pass
The ice-water test and boiling-water test are simple, useful, and appropriate for most food thermometers. Running both gives a better picture than relying on only one, especially if you cook across a wide temperature range.
Check the low end with ice water
A properly prepared ice bath should read 32°F. Fill an insulated cup or glass with plenty of crushed ice, then add just enough clean water to fill the gaps. Stir it and let it sit for a minute. The mixture should look like wet ice, not a cup of cold water with a few cubes floating on top.
Insert the probe so its sensing area is fully submerged. Do not let the tip touch the cup’s bottom or sides, where the reading can be misleading. Stir gently around the probe and wait until the number settles.
A reading of 32°F is perfect. A reading within 1 or 2 degrees is generally good enough for home grilling. If it reads 29°F, for example, it is 3 degrees low. Note that error. A thermometer that reads 40°F in a true ice bath is not close enough for reliable cooking.
The common mistake is using refrigerator-cold water or a drink loaded with a handful of large cubes. That is not an ice bath and it will not reliably sit at 32°F. Use more ice than water.
Check the high end with boiling water
At sea level, pure water boils at 212°F. Bring a pot of water to a full rolling boil, then place the probe in the water without touching the pot. Keep your hands clear of steam and avoid immersing any part of the thermometer that is not rated as waterproof or heat-safe.
Boiling-water testing has one major caveat: boiling temperature changes with elevation. Water boils at roughly 210°F around 1,000 feet, 202°F around 5,000 feet, and lower as elevation rises. Local weather can have a small effect as well, but elevation is the factor most backyard cooks need to account for.
If you live at a higher elevation, do not judge your thermometer against 212°F. Check the expected boiling point for your location first, then compare the reading to that figure. Otherwise, you may “correct” a thermometer that was accurate to begin with.
How to adjust a thermometer, if yours allows it
Some digital thermometers have a calibration mode, often accessed through a button combination. Others, particularly analog dial models, use a calibration nut behind the dial. The process varies by model, so follow the manufacturer’s instructions for the adjustment itself.
For a digital unit, place the probe in the ice bath, wait for a stable reading, and use its calibration function to set the display to 32°F. Confirm the result with a second ice-bath test. If you also use boiling water, check whether the thermometer remains accurate at the high end.
For a dial thermometer, hold the calibration nut steady with a wrench while turning the dial until it reads 32°F in the ice bath. Be careful not to bend the stem. Then retest it. A dial unit that cannot hold its setting or responds very slowly is not worth forcing into service.
Not every thermometer can be adjusted. In that case, apply an offset only if the error is small and repeatable. If your probe reads 3 degrees high in both tests, subtract 3 degrees from its displayed reading. Put a small label on the body if needed. Do not try to mentally compensate for a thermometer that is 10 degrees off one day and 3 degrees off the next.
Test the thermometer the way you actually use it
A thermometer can pass an ice-bath test and still be poor for grilling if you use it incorrectly. Probe placement is a frequent source of bad readings.
On an instant-read thermometer, the sensing area is usually a short section near the tip, not always the very end. Insert it far enough to cover that area, but do not push through a thin steak and read the hot grate below. Check a steak or chop from the side toward the center. For chicken breast, probe the thickest portion and avoid bone.
With leave-in probes, make sure the cable is not pinched under a grill lid or routed directly over a burner. The probe tip should sit in the center of the thickest part of the meat. On a large roast, verify with a separate instant-read thermometer before pulling it from the grill. One fixed probe gives one location, and large cuts do not cook evenly.
Grill-lid thermometers deserve extra skepticism. They measure air near the lid, not the grate temperature where the food sits. They are useful for watching broad trends, but they are not precise cooking instruments. If your smoker’s built-in gauge says 250°F, that does not prove the grate is at 250°F from end to end.
When to calibrate and when to replace
Check a frequently used thermometer at the start of grilling season, after a hard drop, after accidental exposure to extreme heat, and anytime a cook produces suspicious results. If you cook several times a week, a monthly ice-bath check is cheap insurance. For occasional use, checking before a major holiday cook is usually enough.
Replace a thermometer when it has a large error, inconsistent readings, a damaged probe, a cracked display, or slow response that makes it frustrating to use. A budget thermometer that gives a stable reading within a couple of degrees can be more useful than an expensive unit with a damaged cable or failing sensor.
Also pay attention to battery condition. Weak batteries can cause dim displays, delayed readings, and strange behavior. Replace the battery before assuming the sensor has failed.
A practical accuracy standard for home cooks
For most backyard grilling, an instant-read thermometer accurate within 1 to 2 degrees is excellent. Within 3 degrees can still be workable if the error is consistent and you know it. Beyond that, the trade-off becomes harder to justify, particularly for poultry, fish, medium-rare steaks, and long barbecue cooks where timing already requires patience.
Do not chase false precision, either. Meat temperature naturally varies across a cut, and the temperature continues to rise while food rests. The goal is not a perfect-looking display. It is a trustworthy tool used in the right place, with enough accuracy to make sound cooking decisions.
A calibrated thermometer will not make a cheap grill hold steadier heat or rescue bad fire management. It will tell you the truth about what is happening. For backyard cooks who want dependable results instead of guesses, that is one of the most useful upgrades you can make without buying another piece of outdoor equipment.