
A grill parked against the house with no landing space is not an outdoor kitchen. It is a cooking obstacle with a propane tank. The best outdoor kitchens make the actual work of cooking easier: carrying food out, managing heat, checking doneness, serving a crowd, and cleaning up afterward. Everything else is secondary.
That distinction matters because outdoor kitchens are easy to overspend on. A glossy rendering may show a pizza oven, refrigerator, sink, bar seating, and a wall of stone. But if the grill is cramped, the counter is too shallow, or rain can reach every cabinet seam, the setup will be frustrating long after the new-project excitement wears off.
Start With How You Actually Cook
Before choosing appliances or finishes, look at your existing habits. If you cook burgers and chicken twice a week for a family of four, your needs differ sharply from someone who hosts 20 people, smokes brisket overnight, or makes wood-fired pizza every weekend.
Think through the full sequence. Where will raw food sit before it goes on the grill? Where do you set trays, tools, and cooked food? Can one person move between the grill and prep area without blocking another? Is there enough light to check chicken at 8:30 p.m.? These questions are more useful than deciding whether a built-in grill looks better at 32 or 36 inches wide.
For most homeowners, a grill-centered layout with meaningful counter space is the right starting point. A sink, fridge, side burner, or specialty cooker can be useful, but only when it supports a cooking routine you already have. Do not buy an appliance to create a hobby you may not keep.
The kitchen triangle still applies, with fewer walls
Indoor kitchen designers talk about the path between refrigeration, prep, and cooking. The same idea works outside. Your movement should be short and obvious: take food from cold storage, prep it, cook it, then set it down to rest or serve.
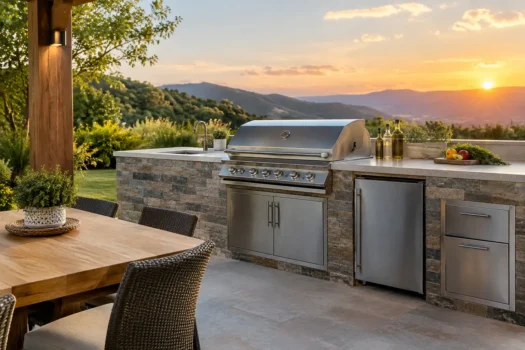
A straight run works well for compact patios. An L-shaped setup gives the cook more counter space and separates hot and cold zones. A U-shape can be excellent for serious cooks, but only if the patio is large enough to avoid a narrow, trapped-in feeling. Islands are useful when you need seating or want the cooking area to face guests, but they cost more because utilities often need to run under the patio.
Avoid placing a grill where the only landing space is directly beside the lid hinge or against a wall. You need room to carry hot grates, hold a sheet pan, and work without balancing things on the side shelf.
Choose the Fuel Before Building the Cabinets
The grill is the working core of an outdoor kitchen. Its fuel type determines not only flavor and cooking style, but also installation, ventilation, maintenance, and how often you will realistically use it.
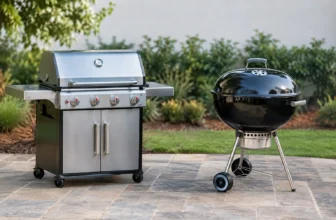
Built-in gas grills are the most straightforward choice for frequent weeknight cooking. They light quickly, offer predictable control, and fit naturally into a counter run. Natural gas is convenient when a properly sized line is available, while propane gives more placement flexibility but requires tank access and refills. Neither option produces the deeper smoke profile of charcoal or wood, but convenience is a real performance benefit when it gets you cooking more often.
Charcoal grills and ceramic cookers suit people who enjoy fire management and want high-heat searing plus low-and-slow capability. They also demand more clearance, ash handling, and a realistic plan for storing fuel dry. A ceramic cooker built into a tight combustible enclosure is not a shortcut to a premium setup. It is a safety and maintenance problem waiting to happen.
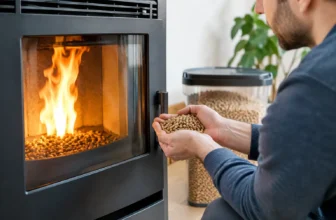
Pellet grills make sense for cooks focused on smoking, roasting, and long unattended sessions. They need electricity, protected pellet storage, and more shelter from wind and rain than many buyers expect. They can be part of an outdoor kitchen, but they are often better positioned as a freestanding unit nearby, where hopper access and cleaning remain simple.
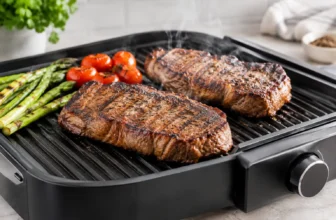
A dedicated pizza oven, griddle, or side burner earns its space only if it expands what you cook regularly. A griddle is genuinely useful for breakfast, smash burgers, fajitas, and large batches. A pizza oven can be great fun, but it has a learning curve and usually needs more clearance than the photos suggest.
Build for Weather, Grease, and Cleaning
Outdoor kitchens do not live in a showroom. They deal with grease splatter, pollen, insects, UV exposure, freeze-thaw cycles, wind-driven rain, and temperature swings. Materials that look impressive on day one can become a recurring upkeep job if they are poorly matched to the climate.
Stainless steel cabinets are durable and easy to wipe down, especially when they use quality hardware and fully enclosed construction. They can show fingerprints and water spots, and lower-grade stainless can discolor or corrode in coastal areas. Powder-coated aluminum cabinets resist rust and usually offer more color options, though a damaged finish can be harder to repair.
Masonry, stucco, stone veneer, and concrete can create a permanent look, but their success depends heavily on the structure beneath the finish. Water intrusion, cracking, and bad drainage are far more expensive to fix than a dented metal door. In freezing climates, use materials and installation methods rated for those conditions. In humid or coastal climates, prioritize corrosion resistance and ventilation.
Countertops need the same practical screening. Dense natural stone, porcelain slab, and properly finished concrete can work well. Tile introduces grout lines that collect grease and grime. Smooth, heat-tolerant surfaces are easier to live with than heavily textured ones, particularly around a grill.
Do not ignore access panels. You need a way to reach gas shutoffs, electrical connections, plumbing, and the back of appliances. A beautiful enclosure that requires demolition to fix a regulator or replace an outlet is poorly designed.
Utilities Are Where Budgets Change Fast
A basic grill island may need little more than a stable, noncombustible structure and safe clearances. The moment you add natural gas, 120-volt power, water, drainage, refrigeration, and lighting, the project becomes more like a small exterior renovation.
Plan utility work early, before concrete is poured or pavers are set. A licensed professional should handle gas and electrical work, local permits, and code requirements. The cost of doing this correctly is not glamorous, but it protects the project and may be required for insurance or resale.
Refrigeration deserves special caution. An indoor mini fridge placed outside will not last. Outdoor-rated refrigeration is built for temperature swings and moisture, but it still needs airflow around its compressor and a protected electrical supply. In very hot climates, expect it to work harder and use more energy.
A sink sounds simple, yet it often adds the most complexity. Supply lines are manageable; drainage, winterization, and local rules are where decisions get real. If you mainly need handwashing and quick rinsing, a nearby hose connection or a simpler cleanup setup may offer better value.
Spend on the Parts You Cannot Easily Replace
When budgets tighten, keep the permanent bones strong and trim the accessories. A good foundation, safe utilities, weather-resistant cabinetry, ventilation, and adequate counter space are difficult to upgrade later. A side burner, ice maker, decorative backsplash, and extra drawer bank are easier to add or live without.
This is also why a modest outdoor kitchen built around a reliable freestanding grill can be smarter than an oversized built-in package. Built-in grills look integrated, but replacing one later can be expensive if the cutout dimensions are uncommon or the manufacturer changes its lineup. Standardized openings and accessible connections preserve your options.
Do not assume more burners equal better cooking. Grill performance comes from usable grate area, heat distribution, control at lower temperatures, recovery after the lid opens, and how easily the grill cleans up. A powerful-looking spec sheet does not tell you whether the burners will rust early or whether grease management works in real use.
Common Layout Mistakes That Cost More Later
The most common mistake is treating seating as the priority and cooking space as an afterthought. Guests need room, but the cook needs a clear work zone, safe traffic flow, and enough separation from hot surfaces. Put stools where people can talk without standing directly behind the grill operator.
Another is building too close to the house, fence, or low roofline. Follow the appliance manufacturer’s clearance requirements, account for open lids and exhaust, and think about where smoke will travel. A grill under a roof may require a properly designed ventilation solution, not just a ceiling fan.
Finally, do not overbuild storage for items that should not live outside. Paper goods, seasoning, cookware, and tools can attract moisture, pests, or rust. Use cabinets for weather-tolerant equipment, and plan a realistic indoor storage routine for the rest.
The right outdoor kitchen is not the one with the most appliances or the biggest stone surround. It is the one that gets used on a random Tuesday, cleans up without a headache, and still makes sense after several seasons of sun, grease, rain, and real meals.