 globalgrillguidecom
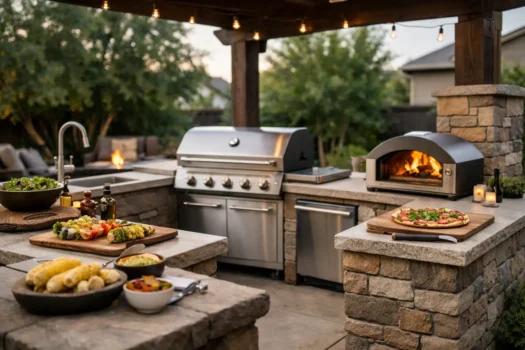
An outdoor kitchen can turn into an expensive patio decoration fast. The difference between a setup you use three nights a week and one that gathers pollen is usually not the countertop or cabinet color. It is whether the layout, grill, utilities, and materials suit the way you actually cook. If you want to know how to build an outdoor kitchen, start with function, then spend money where it improves cooking and long-term ownership.
Table of Contents
Start With Your Cooking Habits, Not the Cabinet Plan
Before measuring a patio, decide what the kitchen needs to do. A homeowner who cooks burgers, vegetables, and occasional ribs has different needs than someone who runs a charcoal smoker every weekend. Trying to accommodate every possible cooking style usually produces a crowded, costly island with appliances that get little use.
Choose the primary cooker first. A built-in gas grill is convenient for weeknight meals and larger gatherings, but it needs a properly planned gas connection and enough clearance for ventilation. A charcoal grill or ceramic cooker offers a different flavor profile and excellent heat control, but it creates ash, needs fuel storage, and should not be boxed into cabinetry without manufacturer-approved clearances. Pellet grills offer set-it-and-forget-it convenience for longer cooks, although they need electricity and protection from rain.
Think through the work sequence. You need a place to prep food, set down hot tools, and carry cooked food inside or to a table. For many backyards, a grill, 24 to 36 inches of usable counter space, and a small weatherproof storage area are more valuable than a sink, refrigerator, pizza oven, and bar packed into one run.
Plan the Site Before You Buy Anything
The best outdoor kitchen location is not always the far corner with the best view. It should make cooking easier while keeping smoke, grease, foot traffic, and weather in check. A kitchen close to the house reduces trips for food and dishes. One too close to doors or open windows can send smoke into the home.
Check how wind moves through the yard. Consistent wind can make burners less efficient, blow smoke toward guests, and turn a comfortable seating area into a bad place to eat. Also consider sun exposure. A west-facing grill station may be fine for morning cooking but miserable during summer dinners without shade.
Leave clear walking paths around the cooking area. You do not want someone squeezing behind a hot grill while carrying drinks or kids cutting through the cook zone. As a practical baseline, plan for at least 36 inches of open passage around active work areas, with more room where people will gather.
Do not ignore drainage. Water pooling against a cabinet base, under a grill, or near an electrical connection shortens the life of everything. A solid patio that slopes away from the house is usually the simplest starting point. If the surface is cracked, uneven, or poorly drained, fix that before adding a few thousand dollars of equipment on top of it.
How to Build an Outdoor Kitchen in the Right Order
Building the base first and choosing appliances later is a common and expensive mistake. Every appliance has cutout dimensions, ventilation requirements, access needs, and clearance rules. Those details should drive the structure, not the other way around.
1. Confirm codes, permits, and utility requirements
Local rules vary, especially for natural gas, propane storage, electrical circuits, plumbing, and permanent structures. A licensed professional should handle gas and electrical work. This is not a place to save money with a questionable DIY connection. A gas leak, undersized wiring, or unprotected outlet can turn a backyard project into a safety problem.
If you want a sink or refrigerator, confirm whether your area requires water lines, drainage, GFCI protection, or permits. Some homeowners skip plumbing and use a nearby hose connection or indoor kitchen instead. That is often the smarter choice for a simpler, lower-maintenance setup.
2. Choose a foundation that will not move
For a permanent kitchen, a concrete slab or properly built paver base is the usual answer. It needs to support the weight of the structure, countertop, appliances, and people leaning on it. Heavy stone veneer, masonry blocks, and concrete counters add up quickly.
A modular outdoor kitchen can be a better fit for an existing level patio, particularly if you may move, reconfigure, or upgrade later. The trade-off is that modular units can look less custom and may offer fewer options for integrating utilities. Still, quality modular components are often a more practical choice than a poorly built permanent island.
3. Build the frame for weather and service access
Framing materials must tolerate moisture, temperature swings, grease, and insects. Powder-coated aluminum, stainless steel, concrete block, and properly rated metal framing generally hold up better outdoors than standard wood framing. Wood can work in protected designs, but it needs careful waterproofing and is rarely the low-maintenance option people expect.
Build access panels into the design. You need to reach gas shutoffs, propane tanks, electrical connections, and plumbing fittings without tearing apart finished stone. This is one of those unglamorous details that matters far more after year two than it does on installation day.
4. Install appliances, counters, and finishes last
Set built-in appliances according to their installation manuals, including ventilation openings and combustible-clearance requirements. Never assume a stainless steel grill head makes the entire unit safe to surround with any material. The firebox, liner, and cabinet area all have separate requirements.
Countertops should be heat-tolerant, stain-resistant, and easy to clean. Granite, concrete, tile, and sintered stone can all work, but each has trade-offs. Concrete is durable but can crack and needs sealing. Tile is repairable but grout collects grease and dirt. Natural stone looks good but may stain if not sealed. Choose based on upkeep you are actually willing to do.
Spend on the Parts That Affect Daily Use
A kitchen does not need every accessory to be useful. Put the budget into the grill, weather-resistant construction, enough counter space, and utility work done correctly. Those decisions affect every cook.
A built-in refrigerator is convenient for drinks and quick access to ingredients, but outdoor-rated models cost more for a reason. Indoor refrigerators are not designed for heat, humidity, or cold swings, and using one outdoors can create safety and reliability issues. If your climate is harsh or the kitchen is uncovered, a cooler may be the more sensible choice.
Likewise, a side burner sounds useful until you consider how often you cook sauces or sides outside. If it will only be used twice a year, spend that money on a better grill, an accurate thermometer, or a larger prep surface. No hype. A kitchen should earn its footprint.
Avoid the Four Mistakes That Create Regret
- Buying appliances before finalizing the layout. This leads to bad clearances, narrow counters, and improvised ventilation.
- Treating weather resistance as a cover. Covers help, but they do not fix poor drainage, unsealed stone, cheap hardware, or cabinets that trap water.
- Adding too many appliances. More equipment means more cleaning, more failure points, and less workspace.
- Forgetting maintenance access. If you cannot reach a valve, remove a grease tray, or service a refrigerator, routine upkeep becomes an expensive repair.
Build for Cleaning and Maintenance
Outdoor cooking produces grease, ash, food residue, and airborne dirt. Your design should make cleanup boring and quick. Avoid deep corners behind appliances, rough countertop seams, and storage areas that cannot be wiped out. Keep trash, paper towels, grill brushes, and a small fire extinguisher within reach without putting them directly beside high heat.
Plan for seasonal maintenance too. Stainless steel resists corrosion, but it is not maintenance-free, especially near salt air. Clean grease from grill trays and burners regularly, check gas hoses for wear, reseal counters when required, and inspect cabinet hinges and drawers after winter. A simple kitchen that receives regular care will outlast a more elaborate setup that nobody wants to maintain.
A well-built outdoor kitchen should make you want to cook outside, not create another property project to manage. Start with the meals you cook, give the grill room to work, and keep the structure simple enough that cleaning and repairs stay manageable.
Comparison Table: How to Build an Outdoor Kitchen That Works
| Outdoor Kitchen Element | Best Approach | Why It Matters | What to Avoid |
|---|---|---|---|
| Primary Cooker | Choose the grill or cooker based on your actual cooking habits | The cooker determines layout, utilities, ventilation, and clearances | Buying appliances after the structure is already built |
| Gas Grill | Built-in gas grill with properly planned gas connection and ventilation | Excellent for fast weeknight cooking and entertaining | Improvised gas connections or insufficient ventilation |
| Charcoal / Ceramic Grill | Allow dedicated space, airflow, ash management, and fuel storage | Provides strong fire-driven flavor and excellent heat control | Boxing the cooker into cabinetry without approved clearances |
| Pellet Grill | Provide electricity and weather protection | Convenient for long, low-temperature cooks | Installing it where rain or moisture can reach electrical components |
| Counter Space | Aim for roughly 24–36 inches of usable prep space at minimum | Gives you room for food prep, hot tools, and serving | Filling the island with appliances and leaving no workspace |
| Storage | Include practical, weather-resistant storage | Keeps tools and supplies close to the cooking area | Building storage that traps moisture or cannot be cleaned |
| Kitchen Location | Position it close enough to the house for convenient food and dish access | Reduces unnecessary trips while cooking | Placing it directly beside doors or windows where smoke can enter |
| Wind Protection | Consider prevailing wind direction during planning | Wind affects smoke, burner efficiency, and guest comfort | Ignoring wind because the location looks attractive |
| Walking Space | Maintain at least 36 inches of clear passage around active work areas | Prevents people from crossing behind a hot cooking station | Narrow paths through the cooking zone |
| Drainage | Use a stable surface that drains water away from the house | Prevents water damage, corrosion, and structural problems | Building over cracked, uneven, or poorly drained surfaces |
| Utilities | Plan gas, electricity, plumbing, and drainage before construction | Utilities determine appliance placement and service requirements | Treating utility work as an afterthought |
| Foundation | Use a stable concrete slab or properly built paver base for permanent installations | Supports the structure, appliances, counters, and daily loads | Building on an unstable or shifting surface |
| Modular vs. Permanent | Consider modular construction when flexibility or easier installation matters | Allows future reconfiguration and can work well on existing patios | Choosing permanent construction when future changes are likely |
| Frame Materials | Use outdoor-rated metal, aluminum, stainless steel, or masonry | Better resistance to moisture, heat, insects, and temperature changes | Assuming standard indoor wood framing is maintenance-free outdoors |
| Service Access | Include access panels for gas, electrical, plumbing, and appliances | Makes repairs and maintenance possible without demolition | Sealing utilities permanently behind finished surfaces |
| Countertop Material | Choose heat-, stain-, and weather-resistant surfaces | Counters face grease, heat, spills, UV exposure, and weather | Choosing solely by appearance |
| Refrigerator | Use an appliance specifically rated for outdoor use | Outdoor-rated units are designed for changing temperatures and humidity | Using a standard indoor refrigerator outdoors |
| Side Burner | Add only if you regularly cook sauces or side dishes outside | Saves money and space when it matches real cooking habits | Paying for an appliance that will rarely be used |
| Cleaning Design | Keep surfaces accessible and avoid deep corners and difficult seams | Makes routine cleaning faster and more likely to happen | Designing around appearance while ignoring grease and ash buildup |
| Maintenance | Plan for seasonal inspections and easy access to wear components | Extends the life of the entire kitchen | Assuming stainless steel or a cover makes the kitchen maintenance-free |
| Safety | Keep required clearances, proper utilities, and a small fire extinguisher accessible | Reduces fire, electrical, and gas-related risks | DIY gas/electrical work or blocked ventilation |
Best Outdoor Kitchen Setup by Priority
| Priority | Where to Spend the Budget | Why |
|---|---|---|
| 1 | Quality grill/cooker | It directly determines cooking performance. |
| 2 | Proper gas, electrical, and plumbing work | Poor utility installation creates safety and maintenance problems. |
| 3 | Weather-resistant structure | Protects the investment from moisture, heat, and temperature changes. |
| 4 | Adequate counter space | Workspace is more useful during every cook than rarely used appliances. |
| 5 | Drainage and foundation | Prevents structural and water-related problems before they start. |
| 6 | Storage and service access | Makes the kitchen easier to use and repair. |
| 7 | Optional appliances | Add only after the core cooking setup works well. |
FAQ: How to Build an Outdoor Kitchen That Works
What should I consider first when building an outdoor kitchen?
Start with how you actually cook. Choose your primary grill or cooker first, determine how much counter and storage space you need, then plan utilities, ventilation, clearances, and the structure around those requirements. This prevents expensive layout changes later.
How much space should I leave around an outdoor kitchen?
Plan for at least 36 inches of clear walking space around active work areas. You also need enough room to fully open the grill, access grease trays or ash catchers, service appliances, and safely move around hot cooking equipment. More space is preferable where guests will gather.
What is the best material for an outdoor kitchen?
There is no single best material for every component. Stainless steel, powder-coated aluminum, concrete block, and other properly rated outdoor materials generally provide good durability for the structure. For countertops, granite, concrete, tile, and sintered stone can all work, provided their maintenance requirements match your climate and expectations.
Do I need a sink and refrigerator in my outdoor kitchen?
No. A sink and refrigerator are convenient but not essential. For many homeowners, a good grill, 24–36 inches of usable counter space, and weather-resistant storage provide more practical value. Add plumbing or an outdoor refrigerator only if you will use them regularly and are prepared for the additional maintenance and installation requirements.
Can I build an outdoor kitchen myself?
Some parts can be DIY-friendly, but gas and electrical work should be handled by qualified professionals and must comply with local codes and permit requirements. The structural and utility requirements of a permanent outdoor kitchen can also vary considerably by location. Before construction, check local requirements and the installation specifications for every appliance you plan to use.