 globalgrillguidecom
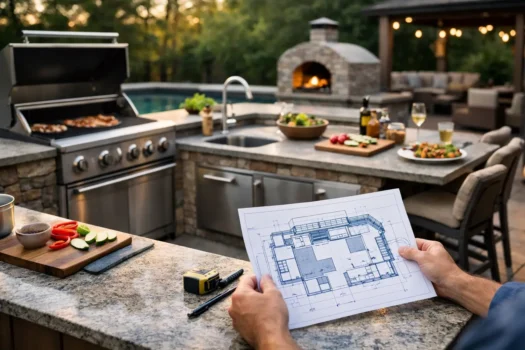
A lot of outdoor kitchens look great in photos and get annoying fast in real use. The grill lid hits a wall. The prep space is too small. The fridge sits so far from the cooking zone that every dinner turns into extra steps. Good outdoor kitchen layout planning fixes that before you buy a single cabinet or appliance.
This is not about chasing a showroom look. It is about building a space that fits how you cook, how often you entertain, and how much maintenance you are willing to live with. If the layout is wrong, even a very good grill setup feels awkward. If the layout is right, a modest setup can feel easy and efficient for years.
Start outdoor kitchen layout planning with how you actually cook
Before you think about shapes, finishes, or add-on appliances, get honest about use. A couple who grills burgers twice a week needs a different layout than someone running a kamado, a gas grill, and a pizza oven for neighborhood parties.
Start with frequency, food type, and headcount. If most meals are quick weeknight cooks, prioritize fast access to the grill, a practical prep area, and simple cleanup. If you host often, traffic flow matters more, and you may need separate zones so one person can cook while others grab drinks or set food without crowding the fire.
Fuel choice changes the layout too. A gas grill usually asks less from the surrounding space because startup is quick and ash management is minimal. Charcoal and wood setups need more room for fuel storage, ash handling, and heat-safe landing zones. Pellet grills introduce hopper access and electrical requirements that people often forget until the island is already designed.
This is where many builds go sideways. People shop by appliance count instead of cooking pattern. More gear does not automatically mean a better kitchen. It usually means more cost, more cleaning, and more things competing for limited counter space.
Pick a layout shape based on the yard, not the brochure
Most outdoor kitchen layout planning comes down to four common formats: straight, L-shaped, U-shaped, and modular multi-zone setups. None is universally best. The right answer depends on your footprint, your utilities, and whether the outdoor kitchen is mainly for cooking or for socializing.
Straight layouts work best in tighter spaces
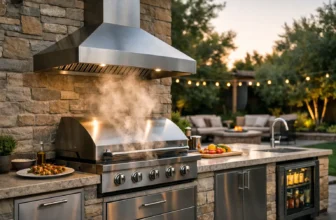
A straight run is often the most practical choice for patios, decks, and smaller backyards. It keeps construction simpler, usually costs less, and makes utility routing easier. If your grill, prep space, and storage all fit without cramming, a straight layout can be the smartest option.
The downside is limited separation. If the grill takes up the center, you can run short on landing space quickly. That matters more than people expect. You need room to set down raw food, trays, tools, and finished items without balancing everything on the side shelf.
L-shaped layouts give most homeowners the best balance
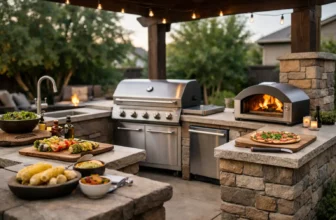
An L-shape usually gives you better separation between prep and cooking without demanding a huge footprint. One leg can handle the grill and hot-zone equipment, while the other supports prep, serving, or refrigeration. For many homeowners, this is the practical sweet spot.
It also helps with crowd control. Guests naturally stay on one side while the cook keeps access to the grill. That sounds minor until you host a few times and realize half the frustration of outdoor cooking comes from people standing in the wrong place.
U-shaped layouts need space and discipline
A U-shaped outdoor kitchen can be very efficient when done well. Everything stays close, and the cook has strong access to prep, cooking, and cleanup zones. But it only works if you have enough room inside the U to move comfortably and open doors fully.
In smaller spaces, a U-shape can feel cramped instead of functional. It also drives up cost fast because you are adding more cabinetry, more countertop, and often more temptation to overbuild. If you mostly cook for a household of four, a U-shape can be more kitchen than you need.
Build around the three zones that matter most
Forget fancy labels. In real use, every good outdoor kitchen has three core zones: cold storage, prep, and cooking. Cleanup matters too, but if you do not have the budget or plumbing for a sink, the first three still need to work together.
The prep zone deserves more space than most homeowners give it. A grill is the visual centerpiece, but prep space does the daily work. You need enough room to season meat, set down trays, rest cooked food, and organize tools without shuffling everything around.
Place cold storage close enough to prep that grabbing ingredients feels easy, but not so close to the grill that someone opening the fridge blocks the cook. If you are adding a beverage fridge, consider keeping it outside the main cooking lane. Drinks create traffic. Traffic near heat is a bad layout choice.
The cooking zone needs heat-safe clearance, lid clearance, and comfortable elbow room. That includes access to side shelves, rotisserie clearance if applicable, and enough open space to avoid brushing against hot surfaces. A grill jammed between cabinets may look built-in, but it can be miserable to use.
Clearance and utility planning matter more than appliance count
This is the unglamorous part of outdoor kitchen layout planning, and it is usually the most expensive to fix later. You need to think through gas lines, electrical access, ventilation, drainage, and the simple reality of opening doors and drawers.
Do not treat manufacturer cutout specs as the whole story. Those measurements tell you whether an appliance can physically fit. They do not tell you whether it will be comfortable to use. A grill may fit inside an island while still leaving poor access for cleaning the grease tray or opening the lid near a backsplash, pergola post, or wall.
Electrical planning is often underestimated. Pellet grills, lighting, refrigeration, rotisserie kits, and powered accessories all change the layout. Extension cords stretched across a patio are not a real solution. Plan outlets where the equipment actually lives.
Weather exposure matters too. If your layout puts the grill in a wind tunnel, temperature control gets harder. If the sink or fridge sits in full sun all afternoon, performance and maintenance can suffer. Shade, drainage, and prevailing wind are not design extras. They affect how the kitchen works.
Leave more room for maintenance than you think you need
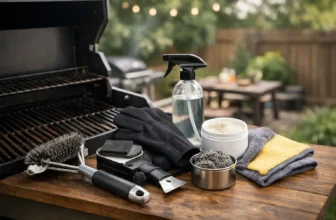
A layout that looks clean on install day can become a maintenance headache within a season. Grease, ash, pollen, moisture, and food debris all need somewhere to go, and you need access to clean them out.
Leave room to remove drip trays, open lower access panels, and service gas connections. If you use charcoal, think about where hot ash will go safely. If you use pellets, make sure hopper lids open fully and pellet storage stays dry and close by. Stainless appliances last longer when they are easier to wipe down and not packed into tight corners that trap grime.
This is also why too many built-ins disappoint. Homeowners pack in side burners, trash drawers, warming drawers, and specialty appliances that sounded useful in the planning stage. A year later, the main grill gets used constantly, the prep area still feels small, and half the extras mostly collect dust.
Match the layout to your budget honestly
A strong layout does not require a luxury build. In many cases, spending less on extra appliances and more on spacing, surface area, and durable materials leads to better long-term results.
If the budget is tight, put money into the grill, countertop workspace, and the utility infrastructure you would hate to redo later. Storage is worth paying for if it keeps tools and fuel protected and close at hand. A sink can be valuable, but only if plumbing costs are reasonable. Refrigeration is convenient, but less critical if your indoor kitchen is a few steps away.
That is the trade-off people miss. Convenience features are only valuable when they save real effort. If a built-in ice maker costs a lot and gets used five times a year, that money probably should have gone into a better grill, better ventilation, or more prep room.
Test the layout before you build it
The easiest way to catch layout mistakes is to mock it up at full size. Use painter’s tape, cardboard, folding tables, or anything else that helps you walk the space. Open imaginary doors. Stand where the grill will be. Pretend to carry trays from prep to cooking to serving.
This sounds basic, but it reveals problems fast. Corners feel tighter than they look on paper. Counter space that seemed generous shrinks once you imagine platters, thermometers, cutting boards, and sheet pans sitting there. Good layout decisions usually get clearer when you move through the space instead of just staring at a plan.
At Global Grill Guide, we tend to trust layouts that solve ordinary problems well. Can you prep without crowding the grill? Can you clean without pulling apart half the island? Can guests hang out nearby without getting in the cook’s way? If the answer is yes, you are probably on the right track.
Outdoor kitchen layout planning works best when it stays honest. Build for the meals you actually cook, the space you actually have, and the maintenance you are actually willing to do. That approach may look less flashy on day one, but it usually feels a lot better by year three.
| Layout | Best For | Main Advantages | Potential Drawbacks | Overall Recommendation |
|---|---|---|---|---|
| Straight Layout | Small patios, decks, compact backyards | Affordable, simple installation, easy utility routing | Limited prep space and workflow separation | Best for small spaces and everyday grilling |
| L-Shaped Layout | Most homeowners | Excellent balance of cooking, prep, and entertaining | Requires more space than a straight layout | Best overall choice for most backyards |
| U-Shaped Layout | Large outdoor kitchens and frequent entertaining | Maximum workspace, efficient cooking triangle, plenty of storage | Higher cost, larger footprint, can feel cramped in small spaces | Best for spacious yards and serious outdoor cooks |
| Modular Multi-Zone Layout | Custom builds and future expansion | Highly flexible, easy to upgrade over time, separates cooking and social areas | More planning required, higher overall investment | Best for homeowners planning long-term upgrades |
FAQ
What is the best layout for an outdoor kitchen?
For most homeowners, an L-shaped outdoor kitchen offers the best balance of prep space, cooking efficiency, storage, and guest flow. Straight layouts work well for smaller patios, while U-shaped kitchens are best for large outdoor spaces.
How much counter space should an outdoor kitchen have?
Aim for at least 24–36 inches (60–90 cm) of dedicated prep space next to the grill. More countertop space makes food preparation, serving, and cleanup significantly easier.
How much space do you need for an outdoor kitchen?
A basic outdoor kitchen can fit within 8–10 feet (2.4–3 m) of linear space. Larger L-shaped and U-shaped layouts generally require at least 100–200 square feet to remain comfortable and functional.
What are the three main zones of an outdoor kitchen?
The three essential zones are:
- Cold storage (refrigerator or cooler)
- Prep area (countertop workspace)
- Cooking zone (grill, smoker, or side burner)
Keeping these zones close—but not overcrowded—creates an efficient workflow.
Should I build my outdoor kitchen all at once?
Not necessarily. Many homeowners benefit from building in phases. Start with the grill, prep space, and storage, then add features like a sink, refrigerator, or side burner after gaining experience with how you actually use the space.