 globalgrillguidecom
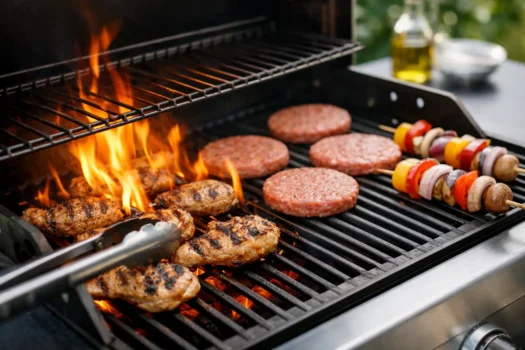
A burger that is charred on one side and pale on the other is not a seasoning problem. It is a heat-management problem. Learning how to fix grill hot spots starts with identifying whether the issue comes from dirty hardware, poor fuel placement, weak airflow, or simply using the wrong part of the grill for the food you are cooking.
Some hot spots are normal. Every grill has warmer and cooler zones, even expensive models. The goal is not perfectly identical heat across every inch of the grate. The goal is predictable heat that lets you sear where you want, cook gently where you need, and move food before it burns.
Confirm You Actually Have Grill Hot Spots
Do not diagnose a grill based on one batch of chicken. Wind, cold weather, a half-open lid, and uneven food placement can all make a normal grill look inconsistent. Start with a simple heat map.
Preheat the grill with the lid closed. On gas grills, run the burners at medium-high for 10 to 15 minutes. On charcoal grills, wait until the coals are fully lit and covered with a light layer of ash. Then place several pieces of white bread across the cooking grate for about a minute. The pieces that toast fastest mark the hottest areas.
You can also use an infrared thermometer to compare grate temperatures, but understand its limitation: it reads surface temperature, not the air temperature around your food. Bread gives a useful real-world picture of how the grate is cooking.
Repeat the test after cleaning or adjusting the grill. If the same areas are drastically hotter every time, you have a pattern worth fixing. If the results change with the weather, your grill may be functioning normally but needs better placement and technique.
Clean the Parts That Disrupt Heat Flow
Grease and carbon buildup are common causes of uneven performance, particularly on gas grills. A dirty cooking grate does not usually create a giant hot spot by itself, but clogged burner ports, blocked heat tents, and a packed grease tray absolutely can.
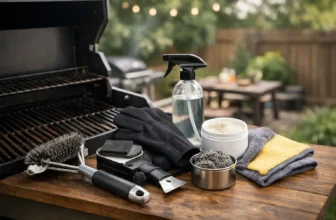
With the grill cool and the fuel turned off, remove the grates and heat diffusers. Brush away loose debris, scrape heavy grease from the underside of the lid and firebox, and empty the grease tray. Then inspect the burner tubes. The flames should emerge evenly from the ports, not flare hard in one place while barely appearing elsewhere.
If burner ports are blocked, clean them carefully with a soft brush or a non-metal pick. Do not force a drill bit, nail, or oversized wire into the openings. Enlarging a port changes gas flow and can make the problem worse. Also check the burner venturi tubes and their screens for spider webs, insect nests, or grease. These obstructions can restrict fuel flow and produce weak, uneven flames.
On charcoal grills, ash is the usual culprit. Ash that chokes the lower vents reduces airflow and makes one side of the charcoal bed burn poorly. Empty the ash catcher before each long cook and make sure the intake and exhaust vents can open fully.
Fix Gas Grill Hot Spots at the Source
A gas grill should deliver a consistent flame pattern before you worry about the cooking grate. Light the burners with the grates removed and inspect them from a safe distance. You want mostly blue flames with small yellow tips, spread evenly along each burner.
A burner that has rusted through, split at the seam, or developed enlarged ports is usually ready for replacement. Cleaning can remove blockage, but it cannot restore metal that has burned away. Replacing a damaged burner is often the most effective repair for a persistent single-zone hot spot.
Next, inspect the heat diffusers, sometimes called flavorizer bars, flame tamers, or heat plates. These parts spread burner heat below the grate and protect the burners from dripping grease. If one is missing, bent badly, or burned through, the grate above it will often run hotter. Replace damaged pieces with parts designed for your grill’s exact model when possible. Generic plates may fit physically but sit too high, too low, or too loosely to distribute heat well.
Check that the burners and diffusers are seated correctly after cleaning. A burner shifted out of its mounting channel can send heat toward one side of the firebox. This is a basic check, but it gets missed often after seasonal deep cleaning.
If all burners look healthy but flame output is weak across the whole grill, the regulator may be in bypass mode. Turn every control knob off, close the propane tank valve, disconnect the tank for a minute, reconnect it, then open the tank valve slowly before lighting the grill. This can reset a regulator that has restricted gas flow. If performance remains poor, inspect the hose and regulator for damage and replace them rather than trying to repair gas components.
Build a Better Charcoal Fire
Charcoal hot spots are usually a setup issue, not a defect. Dumping a chimney of lit coals in the center creates a powerful direct-heat zone. That can be useful for steaks, but it will punish chicken thighs, vegetables, and anything that needs more than a few minutes over the fire.
For general grilling, arrange the coals in an even single layer across part of the charcoal grate, leaving the other side empty. This creates a direct zone and a cooler indirect zone. For longer cooks, bank coals to both sides with an open middle section, or use charcoal baskets to keep the fuel bed from drifting.
The trade-off is straightforward: a dense pile creates stronger searing heat but less usable cooking area. A broad, even bed gives more consistent grilling space but may not produce the same aggressive crust. Choose the layout for the food, not for the appearance of the fire.
Lump charcoal can exaggerate uneven heat because pieces vary widely in size. Place larger pieces toward the edges and smaller pieces where you want faster ignition and stronger heat. Briquettes generally burn more evenly and predictably, which makes them a better choice when consistency matters more than maximum heat.
Keep the lid vent open enough to maintain a clean fire. A starved charcoal fire burns dirty, weakly, and unevenly. Wind can also turn one side of a kettle grill into a blast furnace. Rotate the grill if practical, or position the vents away from strong gusts.
Preheat Longer and Manage the Grate
Many apparent grill hot spots are really preheating failures. The burner area directly below the food gets hot quickly, while the rest of the grate has not had time to absorb and spread heat. Ten minutes may be enough for a thin burger on a small gas grill, but a heavy cast-iron grate, cold weather, or a large grill head may need 15 to 20 minutes.
Preheat with the lid closed, then brush the grate and apply a light coat of oil to the food rather than pouring oil onto the grates. Excess oil on a hot grate encourages flare-ups, and flare-ups create temporary hot spots that no hardware adjustment can solve.
On gas grills, avoid running every burner on high by default. A useful starting point is one burner on medium-high for a sear zone, adjacent burners on medium for roasting space, and one burner low or off for a safety zone. The exact arrangement depends on the grill, but the principle holds: use zones deliberately.
On pellet grills, the hotter area is often near the burn pot. This is normal because the fire is concentrated there. A diffuser plate and drip tray should moderate the heat, but they will not turn a pellet grill into a perfectly even flat-top. Keep delicate food away from the burn-pot area, clean ash from the fire pot regularly, and consider a raised rack for foods that need gentler heat.
Cook Around the Heat Instead of Fighting It
A grill with usable zones is more valuable than one that pretends to be even everywhere. Once you know where your hot spots are, use them. Sear burgers, chops, and thicker vegetables over the hottest section. Move food to the cooler section to finish without burning. Keep a small low-heat area available for flare-up control.
Do not crowd the grate. Food packed tightly together blocks airflow, traps moisture, and forces you to leave pieces in place longer than you should. Give food room, rotate it as needed, and use an instant-read thermometer instead of relying only on time.
If your grill has a persistent severe hot spot after a thorough cleaning, correct assembly, and new burner or diffuser parts where needed, take that seriously. A warped firebox, damaged gas manifold, or poorly designed burner layout may not be worth chasing with accessories. Reliable grilling comes from a grill that gives you controllable zones, not from endlessly compensating for a bad one.
The practical move is simple: map the heat, fix the obstruction or damaged part, then cook with the zones your grill can honestly deliver. That approach produces better food than chasing the marketing promise of perfectly even heat.