
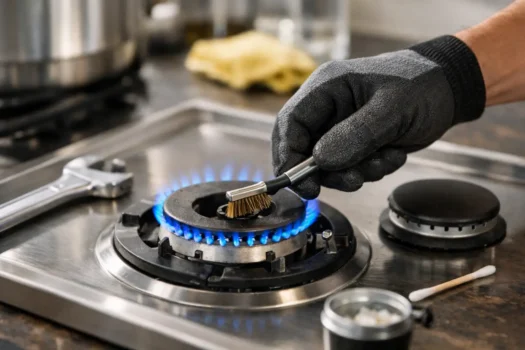
A gas grill can look clean from the outside and still cook badly because the burners underneath are clogged, corroded, or feeding unevenly. Knowing how to maintain gas burners is less about polishing stainless steel and more about protecting the parts that create steady, controllable heat. Do it consistently, and your grill will preheat faster, avoid cold zones, and last longer before expensive parts need replacing.
For most homeowners, burner maintenance is a small job done a few times per season, not an all-day restoration project. The key is addressing grease, blocked ports, moisture, and insect nests before they turn into ignition failures or uneven flames.
Start With a Cold Grill and Shut Off the Gas
Never clean or remove burners while the grill is hot. Turn all control knobs off, close the propane tank valve if you use LP, and disconnect the tank once the grill has cooled. For a natural gas grill, shut off the supply valve before taking components apart.
Remove the cooking grates, warming rack, flame tamers, heat tents, or ceramic briquettes so you can see the burner assembly. This is also the right time to scrape the underside of those parts. Grease and carbon dropping onto the burners are a common source of flare-ups and blocked ports.
Take a quick photo before removing anything, especially if your grill has crossover tubes, multiple burners, or a complicated ignition setup. Burner placement is usually straightforward, but a photo prevents a simple reassembly mistake from becoming an hour of troubleshooting.
How to Maintain Gas Burners Without Damaging Them
Most gas burners are stainless steel, aluminized steel, or cast stainless components. They do not need aggressive cleaning. A stiff nylon brush, a soft wire brush used carefully, and a dry cloth handle most routine work.
Lift each burner out according to the grill’s design. Some slide off the valve openings; others are held in place with cotter pins, screws, or retaining clips. Avoid forcing a stuck burner. If hardware is rusted, use a penetrating lubricant on the fastener and give it time to work rather than bending the burner tube.
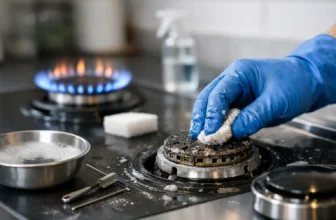
Brush the exterior to remove loose rust, grease residue, and carbon. Then inspect every burner port, which are the small holes or slots where flames emerge. Clear blocked ports with a toothpick, a small nylon pick, or a burner-cleaning tool. Do not drill them larger or force a thick wire through them. Enlarged ports disrupt the gas-to-air balance and can cause tall, yellow flames instead of the short blue flames you want.
If the burner is heavily coated with grease, wash it with warm water and mild dish soap. Rinse thoroughly and let it dry completely before reinstalling it. Water left inside a burner can contribute to rust and poor ignition, particularly in humid climates.
Clean the Venturi Tubes and Burner Openings
The most overlooked part of gas burner care is the burner inlet, often called the venturi tube. This is where gas mixes with air before traveling through the burner. Spiders, insects, dust, and grease can block this area, especially when a grill sits unused for weeks.
Use a venturi brush or a flexible bottle brush to clean inside the inlet tubes. Work gently from the open end toward the burner body, then shake out debris. Check that the openings sit properly over the gas valve orifices when you reinstall the burners. A burner that is not fully seated may fail to light, burn unevenly, or allow flames to appear near the control panel.
This check matters more in spring and after long storage, but it is worthwhile anytime you notice weak flames or a burner that lights with a pop.
Read the Flame Before You Put the Grill Back Together
After cleaning and reassembling the grill, light the burners with the lid open and watch the flame pattern. A healthy burner usually produces mostly blue flames with small yellow tips. The flame should run consistently from front to back, without obvious gaps, roaring sections, or flames lifting away from the ports.
A yellow, lazy flame usually points to poor airflow, grease buildup, blocked burner ports, or debris in the venturi tube. A flame that lifts off the burner can indicate too much air, a misplaced burner, or a gas-flow issue. One dead section typically means blocked ports or internal corrosion near that area.
Do not assume every flame problem is a burner problem. On propane grills, a low tank, a partially closed tank valve, or a regulator that has tripped into bypass mode can all reduce heat output. If every burner is weak, check the fuel supply and regulator before replacing burners that may still be serviceable.
Keep Grease Off the Burners Between Deep Cleans
Burners last longer when the grill’s grease-management system is doing its job. Empty the drip tray regularly and make sure the grease cup is properly seated. A full tray can overflow into the firebox, where grease eventually reaches the burners and creates both maintenance and safety problems.
After cooking, run the grill on high for about 10 minutes with the lid closed to burn off food residue from the grates. This is useful, but it is not a substitute for cleaning the burners. High heat turns some grease into carbon, and carbon still accumulates under flavorizer bars and around burner ports.
A practical schedule depends on how often you cook. For a grill used once or twice a week, inspect the burners every two to three months and clean them at least twice per year. If you cook greasy foods often, use sugary sauces, or grill in a windy, dusty area, inspect more frequently. Heavy users may need a burner check monthly during peak season.
Protect Burners From Water, Rust, and Winter Neglect
A grill cover helps, but only when it fits reasonably well and the grill is dry before covering it. A cover that traps moisture can accelerate corrosion, especially near the burner seams and mounting brackets. If your grill lives on an uncovered patio in a wet climate, occasional airflow is as valuable as keeping rain off it.
Before a long stretch of nonuse, clean out grease, brush the burners, and make sure the firebox is dry. Remove the propane tank and store it upright outdoors, away from direct heat and enclosed living spaces. Do not store a propane cylinder in a basement, garage, or shed attached to the home.
For winter storage, some owners remove burners and keep them in a dry location. That can make sense in harsh coastal or snowy climates, but it is not necessary for every grill. A well-fitted cover, a dry firebox, and a preseason inspection are usually enough for a quality grill stored outdoors.
Know When Cleaning Is No Longer Enough
Surface discoloration and light rust are normal. Burners operate in a harsh environment of heat, grease, moisture, and food acids. Replacement becomes the sensible choice when corrosion has created holes, seams are splitting, ports have rusted away, or the burner will not produce an even flame after a careful cleaning.
Pay attention to the crossover tube as well. This small part carries flame from one burner to the next on many grills. If it is corroded or blocked, you may have to light burners individually even though the burners themselves are still in decent shape.
Replacement burners are not automatically an upgrade. Fit matters more than a generic claim about thicker steel. Use parts designed for your grill model when possible, and compare the cost of the burner set against the condition of the firebox, grates, ignition system, and lid. There is little value in installing premium burners in a grill with a rusted-through cook box.
Check for Gas Leaks After Reassembly
Any time you disconnect or disturb gas fittings, perform a leak check before cooking. With the burners off, turn on the gas supply and apply a mixture of dish soap and water to the connection points. Growing bubbles indicate a leak. Shut off the gas immediately and correct the connection before lighting the grill.
Never use a flame to check for leaks. It is a basic safety step, but skipping it is how a quick cleaning task becomes a preventable accident.
A burner maintenance routine will not make a thin, poorly built grill perform like a better one. It will, however, let the grill you own deliver the heat and control it was designed to provide. Clean the parts that feed the flame, watch for changes in flame behavior, and replace damaged burners before they become a cooking problem or a safety problem.