
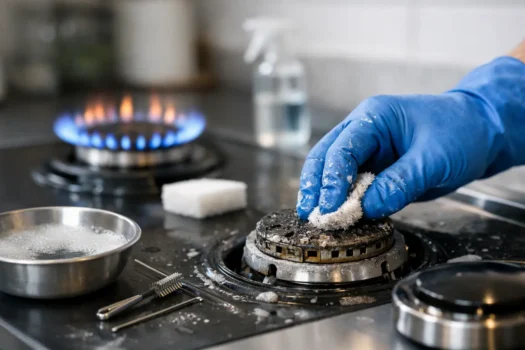
A grill that suddenly cooks hot on one side and weak on the other usually does not need a new burner. It needs attention. Gas burner cleaning is one of the few maintenance jobs that directly affects heat output, flare-ups, fuel efficiency, and how long your grill lasts. Skip it long enough, and grease, carbon, insect nests, and clogged burner ports turn a dependable grill into a frustrating one.
The job is not difficult, but careless cleaning can cause problems of its own. Enlarged burner ports, wet igniters, damaged crossover tubes, and reassembled parts that do not sit correctly can all lead to uneven flames or ignition trouble. The goal is not to make every part look factory-new. It is to restore clear gas flow and safe, consistent flame.
What Gas Burner Cleaning Actually Fixes
A gas burner mixes fuel with air, then sends that mixture through small ports along the tube. Those ports need to be open and evenly sized for the flame to spread correctly. When grease vapor and carbon collect around them, the flame can become lazy, yellow, uneven, or prone to lifting away from the burner.
Blocked burner tubes create a different problem. Spiders and insects are drawn to the odorant in propane and can build webs near the air shutter or burner inlet. That restriction can cause low heat, delayed ignition, or flames appearing near the control panel instead of across the burner. This is not a cosmetic issue. Stop using the grill until the obstruction is cleared.
Cleaning also removes the buildup that feeds flare-ups. Some flare-ups are normal when fatty food drips onto hot surfaces. Repeated flames that race across the cook box are usually a maintenance problem, especially when grease has collected on flavorizer bars, heat tents, burner shields, or in the grease tray.
Before You Clean: Shut It Down Properly
Start with a completely cool grill. Turn every control knob to off, then close the propane tank valve. Disconnect the tank if you will remove burners or work around the gas manifold. On a natural gas grill, close the supply shutoff valve before disassembly.
Remove the cooking grates and heat diffusers. Take a quick photo of the burner layout, crossover tubes, electrodes, clips, and screws before pulling anything apart. It sounds basic, but many ignition problems after cleaning come from a wire or burner tube being reinstalled in the wrong position.
You will usually need a nylon grill brush, a stiff nonmetal brush or old toothbrush, a small bottle brush or flexible venturi brush, warm water, mild dish soap, clean towels, and a wooden toothpick. A vacuum is useful for loose ash, food debris, and dry carbon inside the cook box. Avoid aggressive grinding tools, pressure washers, and drill bits. They can damage coatings, force water into ignition components, or enlarge burner openings.
Gas Burner Cleaning Steps That Work
Clean the parts around the burner first
Scrape the underside of the grates and the heat diffusers while they are removed. You do not need to strip every bit of discoloration. Focus on loose grease, carbon flakes, and debris that can fall onto the burners or ignite during cooking.
Empty and wash the grease tray and disposable catch pan area. If the tray is packed with old grease, cleaning the burners alone will not solve flare-ups. Vacuum the bottom of the cook box, paying attention to corners and the grease channel.
Remove and inspect the burners
Most burners are held in place by a screw, cotter pin, retaining clip, or simple rear bracket. Carefully lift them away from the valve openings. Do not bend the burner tubes, force a stuck burner, or tug on the igniter electrode.
Inspect each burner for corrosion, cracks, warped sections, and ports that have rusted open. Surface discoloration is normal. A burner with holes along the tube seam, severe rust scaling, or a cracked crossover section should be replaced, not cleaned and put back into service.
Clear the burner ports without enlarging them
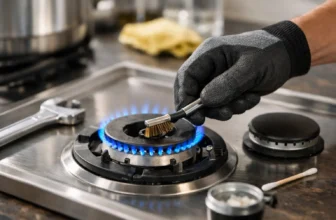
Brush the outside of each burner tube with a nylon or brass-bristle brush. Use a wooden toothpick to clear individual blocked ports. Work gently. The ports are deliberately sized, and pushing a nail, drill bit, or heavy wire through them can enlarge the openings and disrupt the flame pattern.
For stubborn debris, run a soft brush along the burner tube and tap it lightly over a trash can. If the manufacturer permits washing the burner, use warm soapy water and rinse thoroughly. Let it dry completely before reinstallation. Water left inside a burner can cause poor ignition and sputtering flames on the next cook.
Clean the venturi and burner inlet
The burner inlet is where the tube slides over or near the gas valve. This is the area most likely to collect spider webs and insect debris. Use a bottle brush or purpose-made venturi brush to clean inside the tube, moving from the open burner end toward the inlet when possible.
Do not poke objects into the gas valve orifice itself. That small brass fitting meters fuel, and damage there can create an unsafe gas-flow problem. Clean the burner tube around it, not the valve opening.
Protect the igniter and reassemble carefully
Wipe the igniter electrode with a dry cloth or soft brush. If it is coated in grease, a lightly damp cloth is fine, but dry it afterward. Check that the electrode is not cracked and that its tip sits close enough to the burner or crossover point to spark reliably.
Reinstall each burner so it seats squarely over the valve and rests in its original bracket. Reattach clips and screws. Replace heat diffusers and grates, then reconnect the fuel supply.
Before lighting, open the tank valve slowly. A fast opening can occasionally trigger the propane regulator’s safety device and produce weak flames that look like a burner problem. Check for gas leaks at any connection you touched using a soap-and-water solution. Bubbles that grow indicate a leak. Shut off the gas and correct the connection before using the grill.
Check the Flame Before You Cook
Light the grill with the lid open and observe each burner on high. A healthy flame is mostly blue, stable, and evenly distributed from front to back. Small yellow tips can be normal, especially outdoors, but large yellow flames, popping, or blank sections point to remaining debris, poor burner alignment, or a failing burner.
Then test the burners on low. This matters because many grills can look acceptable on high while struggling to hold a low, even cooking temperature. If one burner remains weak after cleaning, swap its position with another burner only if the grill design allows it. If the problem follows the burner, replace it. If it stays in the same location, inspect the valve, igniter area, and manifold alignment.
How Often Should You Clean Gas Grill Burners?
For most backyard grills, brush grates and check the grease system after every few cooks. Give the cook box and heat diffusers a more thorough clean every few months during active grilling season. Burner removal and internal cleaning usually makes sense once or twice a year.
The right schedule depends on use. A grill that cooks burgers, skin-on chicken, and ribeyes every weekend needs more attention than one used for lean vegetables and occasional steaks. Coastal humidity, long periods under a cover, and frequent insect activity can also justify more frequent burner inspections.
Mistakes That Shorten Burner Life
The biggest mistake is burning off grease and calling it cleaning. A high-heat burn can loosen residue on the grates, but it does not clear the grease tray, burner inlets, or clogged ports. It may also bake carbon harder onto neglected parts.
Do not coat burners with oven cleaner or harsh degreaser unless the grill manufacturer specifically approves it. These chemicals can attack metal finishes, leave residue, and damage nearby ignition parts. Likewise, do not use a pressure washer inside the grill. It can drive grease into places you cannot inspect and soak components that need to remain dry.
If burners are severely corroded, replacement is the honest answer. Cleaning cannot restore metal that has thinned, cracked, or rusted through. A cheap replacement burner that fits poorly is not always a bargain either. Correct fit determines valve alignment, flame carryover, and long-term reliability.
A clean burner will not make a thin, poorly designed grill hold heat like a heavy premium model. What it will do is let your grill perform as well as its design allows. Keep the grease system clean, inspect burner inlets before the first cook of the season, and address uneven flames early. That is cheaper than replacing parts after a preventable fire or a ruined dinner.